Disclaimer: This post contains affiliate links. If you purchase through these links, I may earn a small commission at no extra cost to you. Thank you so much for supporting my work.
Baking a 16-Layer Medovik for My Husband’s 30th Birthday
When my husband’s 30th birthday came around, I knew I didn’t want to settle for an ordinary cake. A milestone like thirty deserves something with depth and meaning—something more than just sugar and frosting. After much thought, I landed on the perfect choice: a 16-layer Russian Medovik Honey Cake.
This wasn’t just about flavor (though it’s incredible). It was about heritage, symbolism, and love. Being Russian myself, Medovik is part of my culinary DNA. It’s a cake steeped in history, known for its golden honey layers and tangy sour cream frosting. And for my husband, I chose it because he is truly the worker honey bee of our family—the one who tirelessly provides, protects, and nurtures our hive. A cake built on honey felt like the sweetest tribute I could give him.
History of Medovik Cake
Medovik is like a story layered in honey, flour, patience, and time. Originating in the 19th century, it has become a beloved cake across Russian and Eastern European households, often brought out for the biggest celebrations.
For me, baking Medovik connects me to my roots. I remember hearing about grandmothers who would roll out endless layers, spending hours to make sure the cake was just right. It’s a cake of effort, one that demands love in action.
And for my husband, it carried an even deeper meaning. He’s the steady worker bee of our family, buzzing with dedication, working tirelessly to build a better life for us. Just as bees transform simple nectar into golden honey, he takes everyday effort and turns it into stability and sweetness for our little hive. Medovik—built on honey—was the perfect symbol of who he is.
Sixteen layers of golden cake, thin and humble on their own, stacked together into something strong and beautiful. That’s exactly how I see our life together—each day and each effort building into something extraordinary.
The Baking Journey: 16 Layers of Patience
I won’t lie—this cake is a labor of love. Every layer must be rolled thin, baked individually, and frosted with care. By the time you reach layer 16, you understand why Medovik has earned its legendary reputation.Here’s how it all came together:
Step 1: The Honey Base
The magic starts with honey, sugar, and butter gently melted together over a water bath. The aroma alone is enough to make your kitchen feel like a beehive—warm, sweet, and golden. Once melted, I whisked in eggs and baking soda, watching the mixture bubble into a light, airy base.
I used Raw Organic Manuka Honey.
Tools I used:
Stainless Steel Mixing Bowl Set – ideal for water baths.
Silicone Whisk – sturdy enough for constant whisking.
Step 2: The Dough
Next came flour—organic, unbleached all-purpose. Stirring it in transformed the mixture into a soft dough, warm to the touch and lightly sticky. It needed just a little rest before rolling.
Organic All-Purpose Flour
Step 3: Rolling the Layers
This is where patience shines. Each layer is rolled thin, pricked with a fork, and baked for 3–4 minutes until golden. I used a dinner plate as a template to trim them perfectly round, saving the scraps for later.
By layer 10, I started feeling like a bee myself—methodically working, each step adding to the hive.
French Rolling Pin
Silicone Baking Mats
Step 4: The Frosting
Unlike heavy buttercream cakes, Medovik uses a simple sour cream frosting. I whipped sour cream, powdered sugar, and heavy cream together until it was thick, tangy, and slightly sweet. It was the perfect counterpart to the honey-rich layers.
KitchenAid Stand Mixer
Step 5: Assembly
Layer by layer, I spread the frosting generously, watching the cake rise taller and more impressive with each stack. By the 16th layer, I felt like I was building a tower of honeyed devotion. Finally, I coated the outside with the crushed layer trimmings, giving it its signature golden crumb finish.
Step 6: Decoration
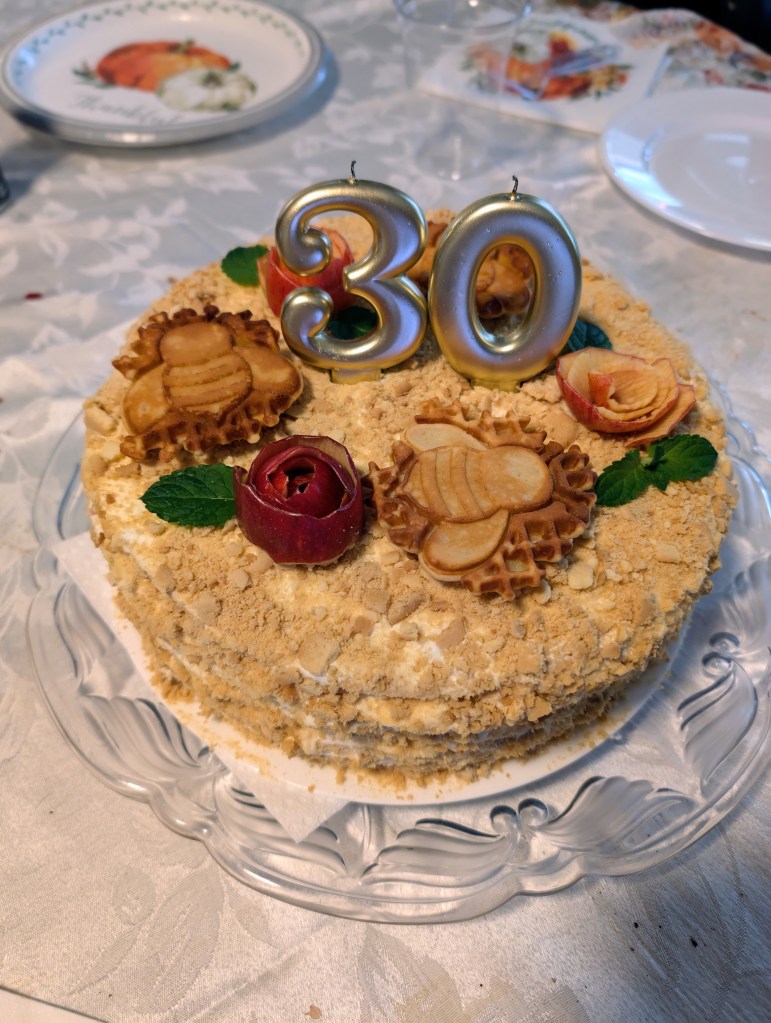
To tie in the bee symbolism, I decorated the cake with honeycomb, bee-shaped waffles, apple peel roses, and fresh mint. With the gold “30” candles perched on top, it looked like a royal centerpiece.
Gold Birthday Candles
The Recipe
Ingredients (12 slices)
Cake Layers:
4 Tbsp honey (1/4 cup)
3/4 cup granulated sugar mm
2 Tbsp unsalted butter
3 large eggs, beaten
1 tsp baking soda
3 cups all-purpose flour
Sour Cream Frosting:
32 oz sour cream
2 cups powdered sugar
1 cup heavy whipping cream
Decoration:
Honeycomb Bee waffles
Apple peel roses
Fresh mint
Tips for Success
Use a water bath. It prevents honey from scorching.Prick each layer. It helps the frosting seep through, making the cake tender.
Save your trimmings. They’re perfect for the crumb coating.
Let it rest overnight. Medovik is best when the frosting has soaked into the layers, turning crisp edges soft.
Embrace the process. It’s time-consuming, but every step adds meaning.
The Big Reveal
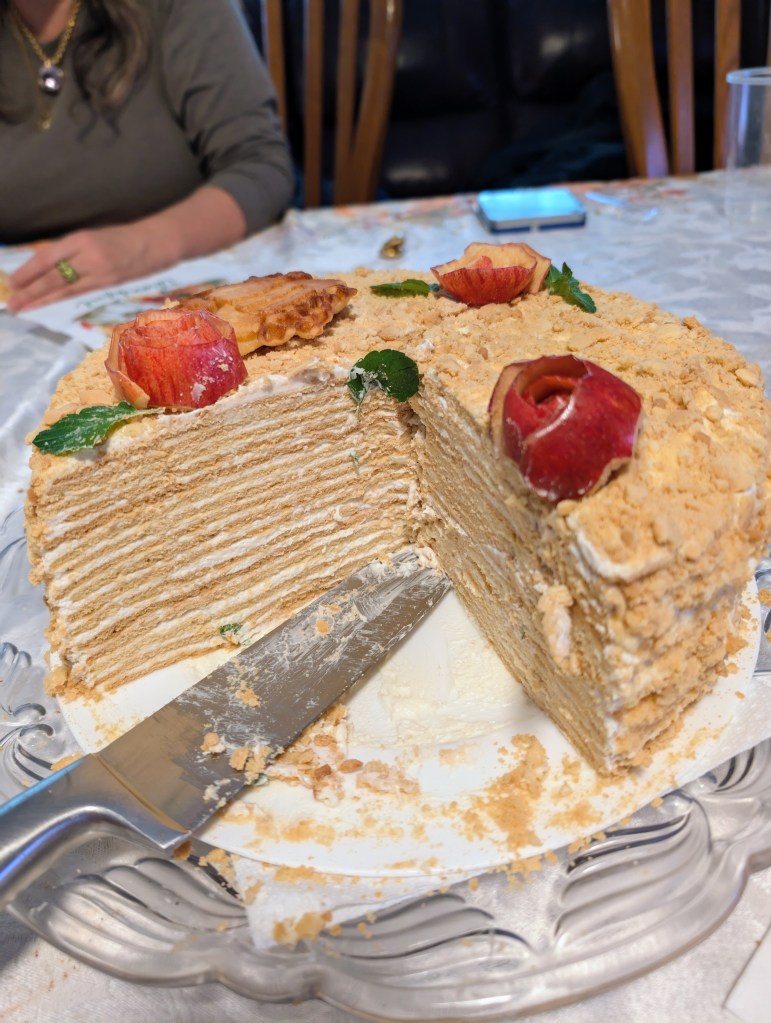
When I finally brought out the cake, the golden “30” candle flickering, my husband’s face said it all. He smiled, surprised and touched, and when he sliced into it, the 16 delicate layers revealed themselves like tree rings—each one marking time, effort, and care.
The symbolism wasn’t lost on anyone. A Russian cake for my heritage, built with honey for my worker bee husband, made with sixteen layers of patience for thirty years of life. It was more than cake—it was a story, a gift, and a memory.
If you’ve never made Medovik, let me warn you: it takes time. But like the bees that inspire it, persistence pays off. The result is breathtaking—not just visually but emotionally.
For my husband’s 30th, this cake wasn’t just dessert. It was a tribute. To my culture, to our family, and to him—the steady bee who keeps our hive thriving.
And when he said, “This is the best cake I’ve ever had,” I knew that every rolled layer and every hour in the kitchen was worth it.

One Comment Add yours