Disclaimer: This post contains affiliate links. If you purchase through these links, I may earn a small commission at no extra cost to you. Thank you so much for supporting my work.
There’s something majestic about a statue, and something beautiful about capturing a moment in time with your hands—especially when it involves your children. Photographs are wonderful, but creating a sculpture brings an entirely new dimension to preserving their personality and smallness at a certain age. Recently, I set out to make a statue of my son Neil, who was three at the time. I wanted to preserve not only his likeness but also his playful, bold little personality. The result was a clay statue we lovingly called “Cheering Child.”
In this post, I’ll walk you through exactly how I made the sculpture, the tools I used, what to watch out for, and how to make sure your project lasts. If you’ve ever thought about sculpting but felt intimidated, don’t worry—white air-dry clay is approachable, forgiving, and affordable. Let’s dive in!
Why White Clay?
The clay I used is a natural white air-dry earth clay (I ordered mine here). It’s technically kaolinite-based, which is a soft, fine-grained mineral primarily made of aluminum silicate. Kaolinite is the same mineral used in porcelain and ceramics.
What makes this clay so wonderful for home sculpting is:
Smooth texture: It’s silky to the touch and easy to shape once softened.
High plasticity: It holds detail beautifully, making it perfect for expressive faces and folds of clothing.
Stone-like finish: Once dried, it resembles white marble or limestone—so much so that you might joke your living room suddenly houses a mini Michelangelo masterpiece (without the chisel, the fortune, or the years of apprenticeship).
Non-toxic & safe for kids: My boys even got to poke at it and try simple clay tools alongside me.
Tools You’ll Need
Here’s a complete list of what I used for this project:
White air-dry clay ( check it out here)
Pliers (for bending and twisting wire)
Sculpting wire or aluminum armature wire (I used this)
Wire cutters (check out this pliers/cutter combo tool)
Masking tape (optional, to bulk up wire areas before adding clay)
Basic clay tools (dull sculpting tools, popsicle sticks, or butter knives work too) get them here
Spray bottle with water (to keep clay moist)
Plastic wrap, plastic trash bag or a damp towel (to cover your project between sessions)
Sandpaper (fine grit) for smoothing after drying
Acrylic sealer or varnish (for longevity)
Step 1: Building the Wire Maquette
The maquette is essentially the skeleton of your sculpture—the inner support that gives shape and stability.
1. Measure and cut your wire: Estimate your child’s pose. For Neil, I wanted him sitting with arms raised in triumph. I cut a main length for the spine and legs, and smaller pieces for the arms.
2. Twist with pliers: Use pliers to twist joints tightly where the wires meet. Think of it like stick-figure anatomy.
3. Add bulk (optional): If you want a sturdier figure, wrap some masking tape around thicker areas like the torso. This saves clay and reduces cracking.
Step 2: Adding the Clay
When you first open the clay, it may feel stiff. Work it in your hands to warm it up. It will look strange at first but keep at it and the shape will get more and more defined.
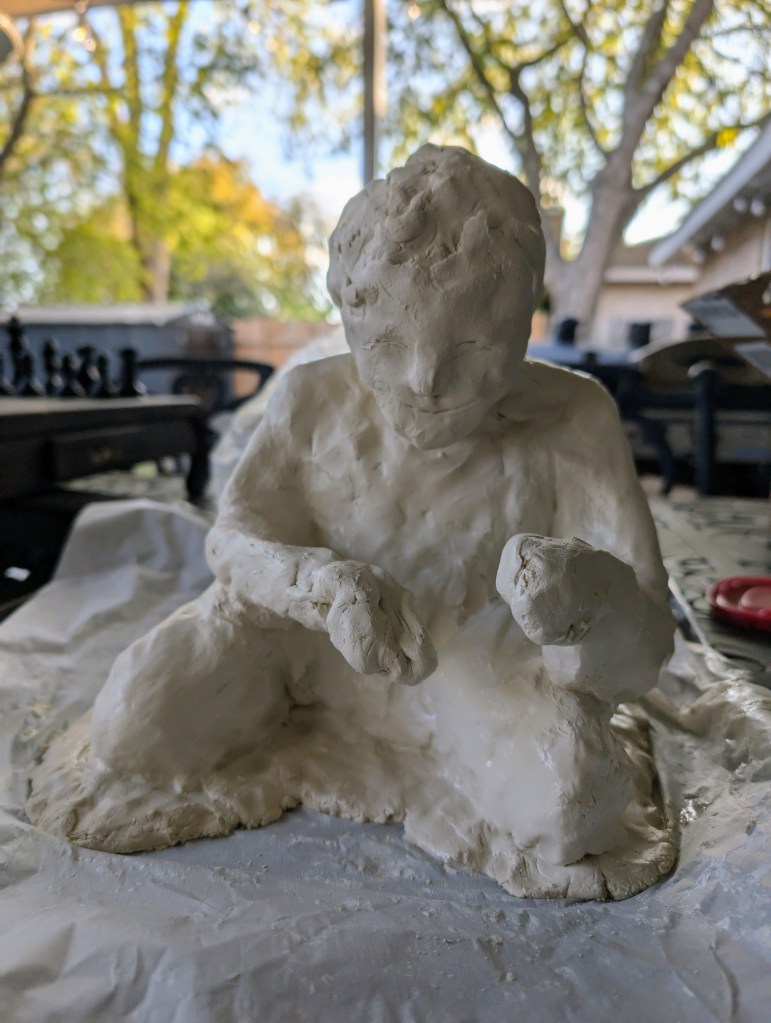
1. Start with a thin layer: Press the clay around your wire armature, beginning with the torso and working outward.
2. Build in stages: Don’t try to sculpt everything at once. I let the torso sit for a day before adding arms and details. This prevents slumping.
3. Smooth with water: Keep a spray bottle nearby. A light mist or damp finger helps blend seams and keep the clay pliable.
Step 3: Keeping Clay from Drying Out
Air-dry clay does exactly that—it dries when exposed to air. Since sculptures usually take days or weeks, here’s how to keep your project workable:
Cover it nightly: At the end of each session, wrap your sculpture in plastic wrap or cover it with a damp towel, then loosely with a plastic bag.
Work in short sessions: Avoid leaving the clay exposed for hours.
Rehydrate cracks: If cracks appear while working, mist with water and gently knead them out.
Step 4: Detailing
This is the fun part where your sculpture comes to life.
Facial features: Use the tip of a clay tool or even a dull pencil to form eyes, mouth, and hair texture.
Clothing folds: Drag a dull edge across the clay to mimic fabric creases.
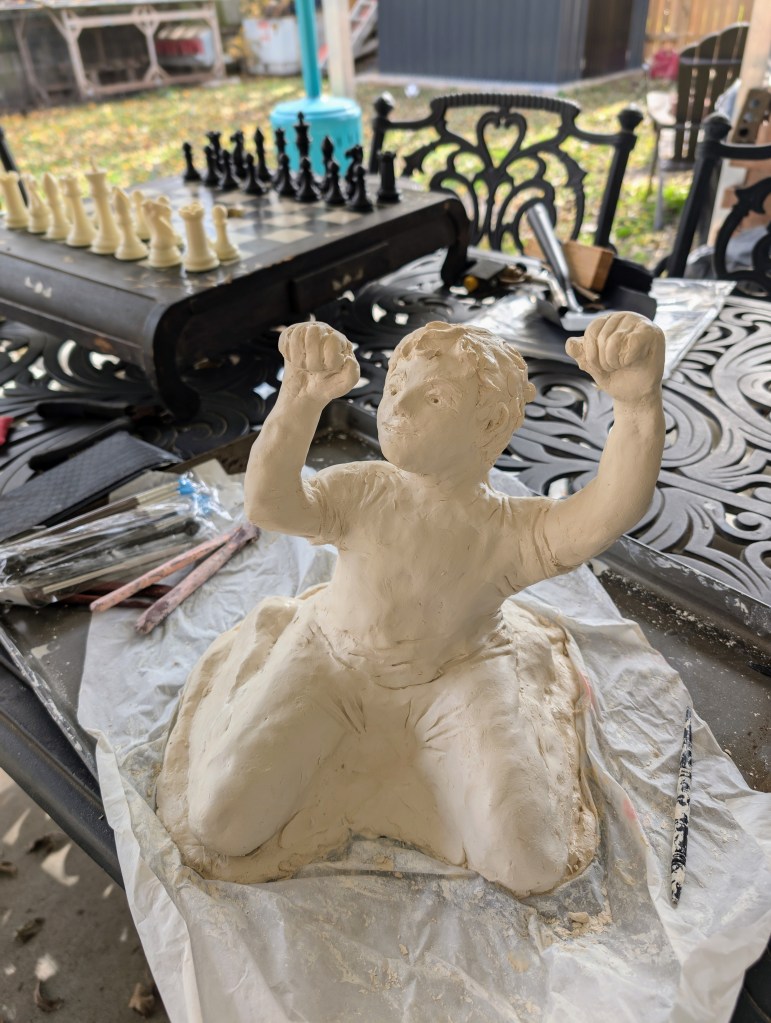
Hands & fingers: Simplify for beginners—little fists or mitten-style hands work well. For Neil’s statue, I emphasized his small clenched fists in the air.
Step 5: Drying and Cracking Prevention
Drying can take anywhere from 1–3 weeks depending on thickness. Mine took about three weeks total.
Tips to reduce cracking:
Dry slowly: Don’t rush the process with heaters or sunlight. Let it air dry naturally.
Even thickness: Keep clay layers consistent. Very thick areas crack more easily.
Repairing cracks: If cracks appear after drying, fill them with fresh clay mixed with water into a paste (slip). Smooth over and let dry again.
Step 6: Finishing Touches
Once completely dry:
Sand gently: Use fine sandpaper to smooth rough spots.
Seal it: Brush on a coat of acrylic varnish or matte sealer. This not only protects from moisture but also enhances the marble-like look.
Tips for Longevity
Keep indoors: Air-dry clay isn’t waterproof, so avoid outdoor display unless sealed heavily.
Handle carefully: While sturdy, it’s not stone. Treat it like a ceramic piece.
Touch-ups: Small chips can be patched with fresh clay even after sealing.
Why It’s Totally Worth It
The finished “Cheering Child” statue became a memory preserved in three dimensions. Every time I see it, I remember Neil at three years old, raising his little arms in triumph and flashing that mischievous grin. The clay, once just a humble bag of earth, transformed into something meaningful and lasting.
And while it’s not a Michelangelo masterpiece, the way the white clay mimics marble gives it a timeless, almost classical feel. For a fraction of the cost and difficulty, you can create something that feels like it belongs in a gallery—even if the gallery is just your living room shelf.
Sculpting with white clay is a wonderfully rewarding project, especially if you’re a parent hoping to capture a moment in your child’s life. With just a few tools, some patience, and a bit of creativity, you can create a piece of art that feels personal and precious.
